Terraform AKS/Azure Authentication
If you're using an AKS cluster for your management server, and you want to run Terraform that deploys resources on Azure, you can use a Azure Workload Identity (valid for AKS clusters version 1.22+) that allows the cluster to securely authenticate with Azure using K8s service account and an Open ID connect (OIDC) token.
Stack Automation does not support running the Stack Automation Management Server on an AKS cluster using Burst Type VMs as cluster worker nodes. Please use a different VM type.
The basic process is as follows:
Azure Configuration
Prerequisites
- Azure CLI installed locally or use Azure CLI in Azure portal
- If not installed: Download the MSI from https://aka.ms/installazurecliwindows and run the installer.
- Update to latest:
az upgrade
- Install aks-preview Azure CLI extension and update extension to latest:
az extension add --name aks-preview
az extension update --name aks-preview - Command-line with kubectl installed connected the cluster where you installed the Stack Automation management server.
To connect to the cluster use:
kubectl config use-context <your-cluster>
Configure the Azure Workload Identity
-
Set CLI context to the Azure Subscription the AKS cluster is in:
az account set --subscription (subscription name or ID) -
Enable WorkloadIdentity feature on Azure Subscription:
az feature register --namespace "Microsoft.ContainerService" --name "EnableWorkloadIdentityPreview"
This step may take 10-20 minutes until it is in effect, use the below command to check the state of the registration until it says "Registered"
-
Check registration status:
az feature show --namespace "Microsoft.ContainerService" --name "EnableWorkloadIdentityPreview" -
Propagate registration:
az provider register --namespace Microsoft.ContainerService -
Update the AKS cluster to enable OIDC and Workload Identity:
az aks update -g {aks_resource_group_name} -n {aks_cluster_name} --enable-oidc-issuer --enable-workload-identity
Copy the "issuerURl" from the response to this command to a note for use later as OIDC_ISSUER_URL.
- Create a managed identity and grant permissions:
az identity create --name {Managed_Identity_Name} --resource-group {AKS_Resource_Group_Name} --location {resource_group_location} --subscription {aks_cluster_subscription_id}
Copy the Managed Identity's name and "client id" to a note for use later.
-
Add permissions to the managed identity at the subscription level using azure portal (this example uses the "contributor" role. You can select a different role, that has enough permissions to run your terraform modules):
a. Go to the Subscriptions page (type in the search box “subscriptions”).
b. Click the appropriate subscription.
c. Select Access Control (IAM).
d. Click + Add and select Add role assignment.
e. Select Contributor and click Next.
f. In the Members page, select the User, group or service principle option and click the + Select members link.
g. Use the search bar to find and select the managed identity. Then, click Select.
h. Click Create to create the role assignment.
-
Create a file called aks_workload_id_service_account.yaml with the below content:
Replace the {property name} with the corresponding values. For service account name, choose a new name. Take a note of the namespace that you select for Stack Automation Deployments (it will be in use in the next part - Stack Automation configuration)
apiVersion: v1
kind: ServiceAccount
metadata:
  annotations:
    azure.workload.identity/client-id: {Managed_Identity_Client_ID}
  labels:
    azure.workload.identity/use: "true"
  name: {New_Service_Account_Name}
  namespace: {Stack_Automation_Deployments_K8s_Namespace}
-
Apply the file on your AKS Cluster
kubectl apply -f {path_to_file}\aks_workload_id_service_account.yaml -
Establish federated identity credential (Allow the AKS Cluster's OIDC provider access to the Managed Identity via the service account)
az identity federated-credential create --name {federated_credential_name} --identity-name {managed_identity_name} --resource-group {managed_identity_resource_group} --issuer {AKS_cluster_OIDC_issuer_URL} --subject system:serviceaccount:{Stack_Automation_Deployments_K8s_Namespace}:{service_account_name}
Stack Automation Configuration
Prerequisites
Have the following formation ready (from the previous section)
- Tenant ID (displayed in the Azure Active Directory > Overview)
- Subscription ID
- The namespace where the Stack Automation deployments will run (which you chose previously) and the service account name (which you also created in the previous step).
Configure the AKS authentication in Stack Automation
There are 2 ways to accomplish this:
-
(Recommended) When adding a new AKS management server, you can provide the Azure Tenant ID, and when attaching it to a space you can provide the default_subscription.
a. Navigate to Resources → Management Servers and click New Management Server in the top-right corner to open the Connect a Management Server wizard.
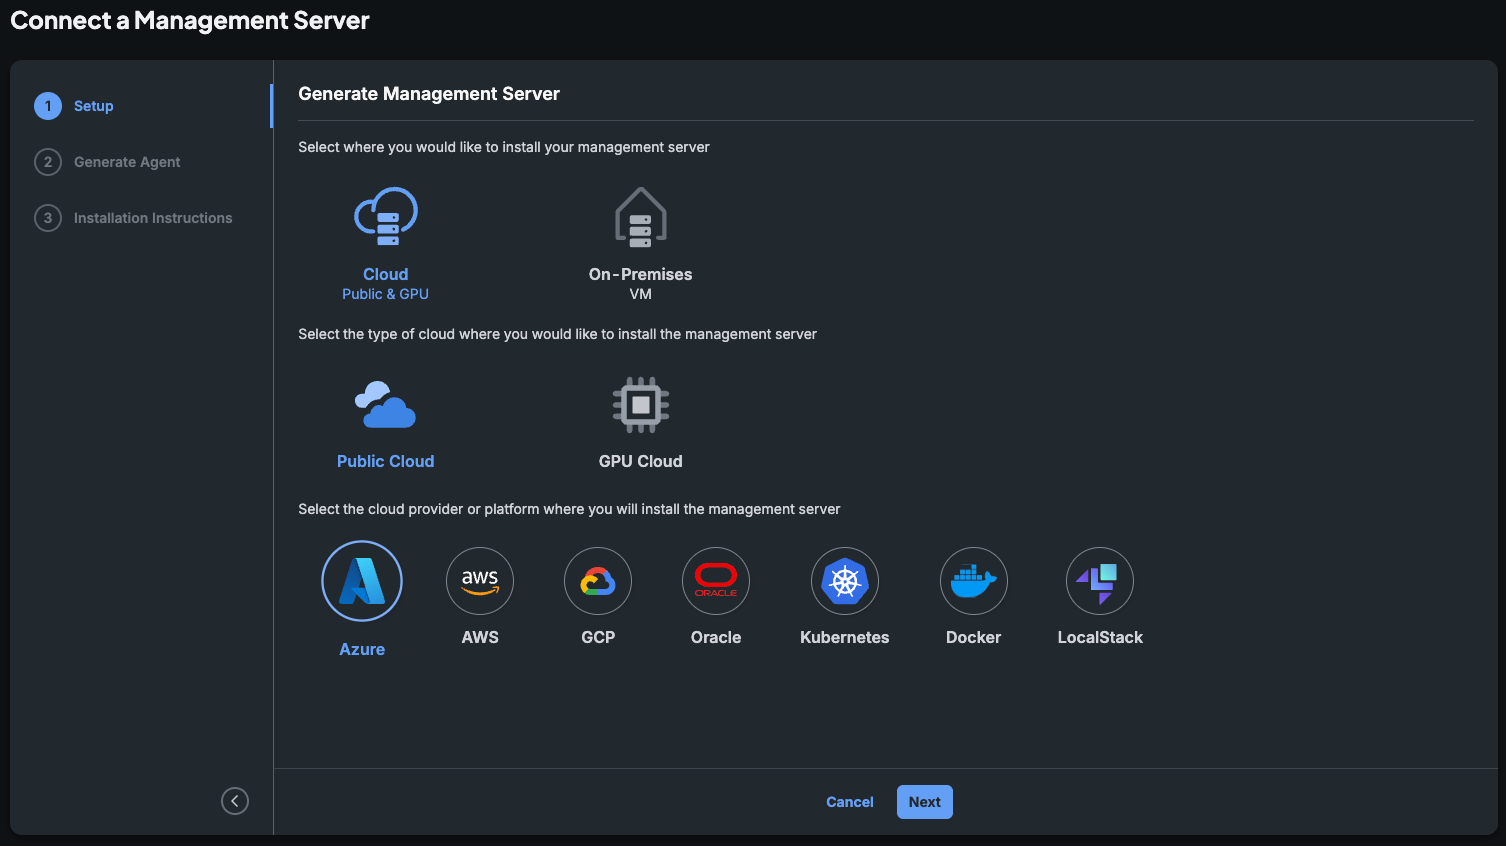
b. In the Setup step, choose Cloud, then Public Cloud, then select the Azure tile, and click Next.
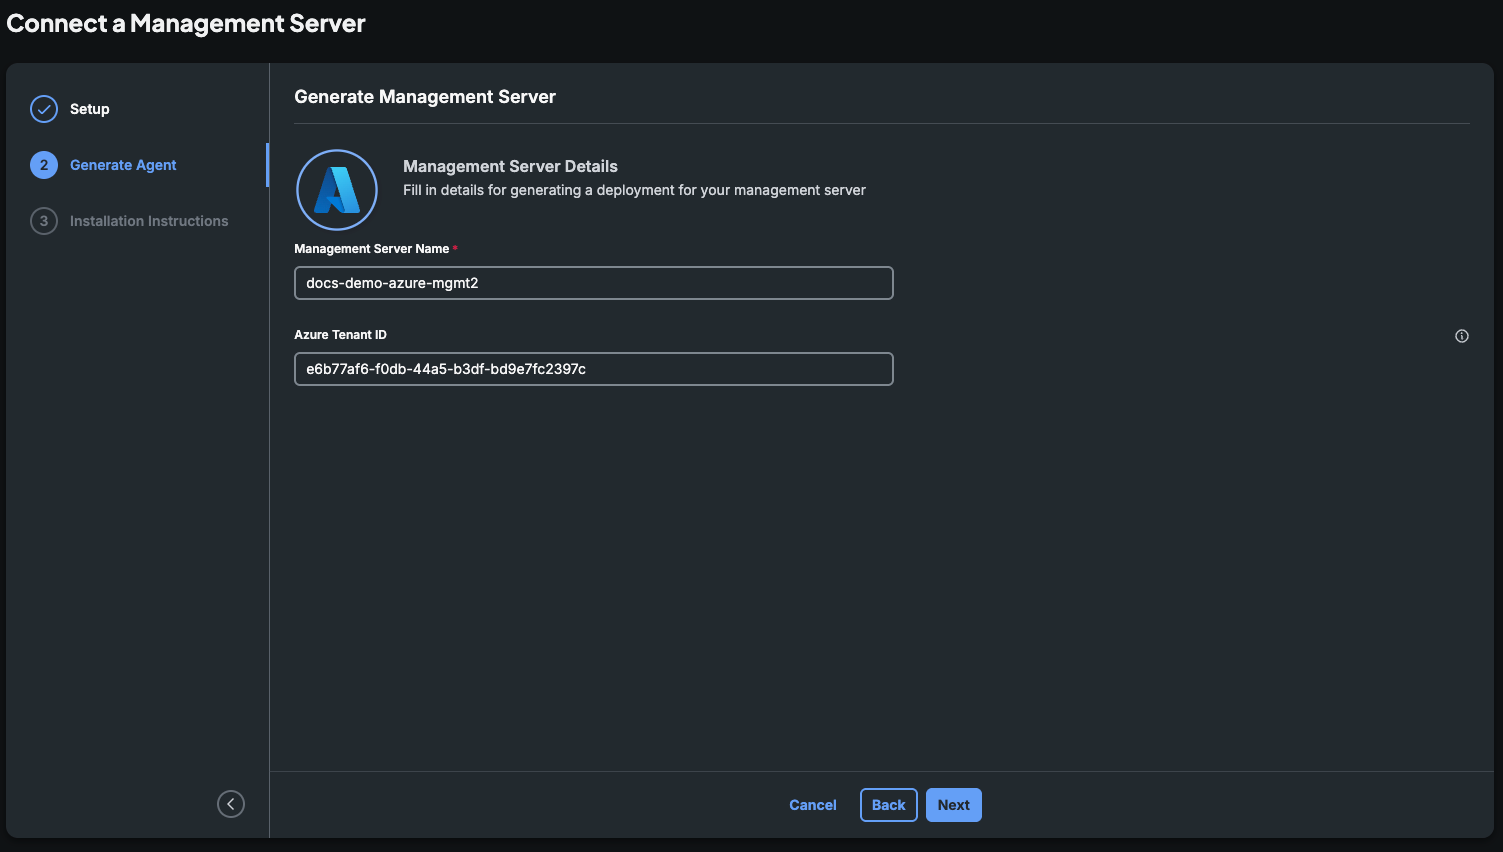
c. In the Generate Agent step, give the management server a name and, optionally, the Azure Tenant ID, then click Next.
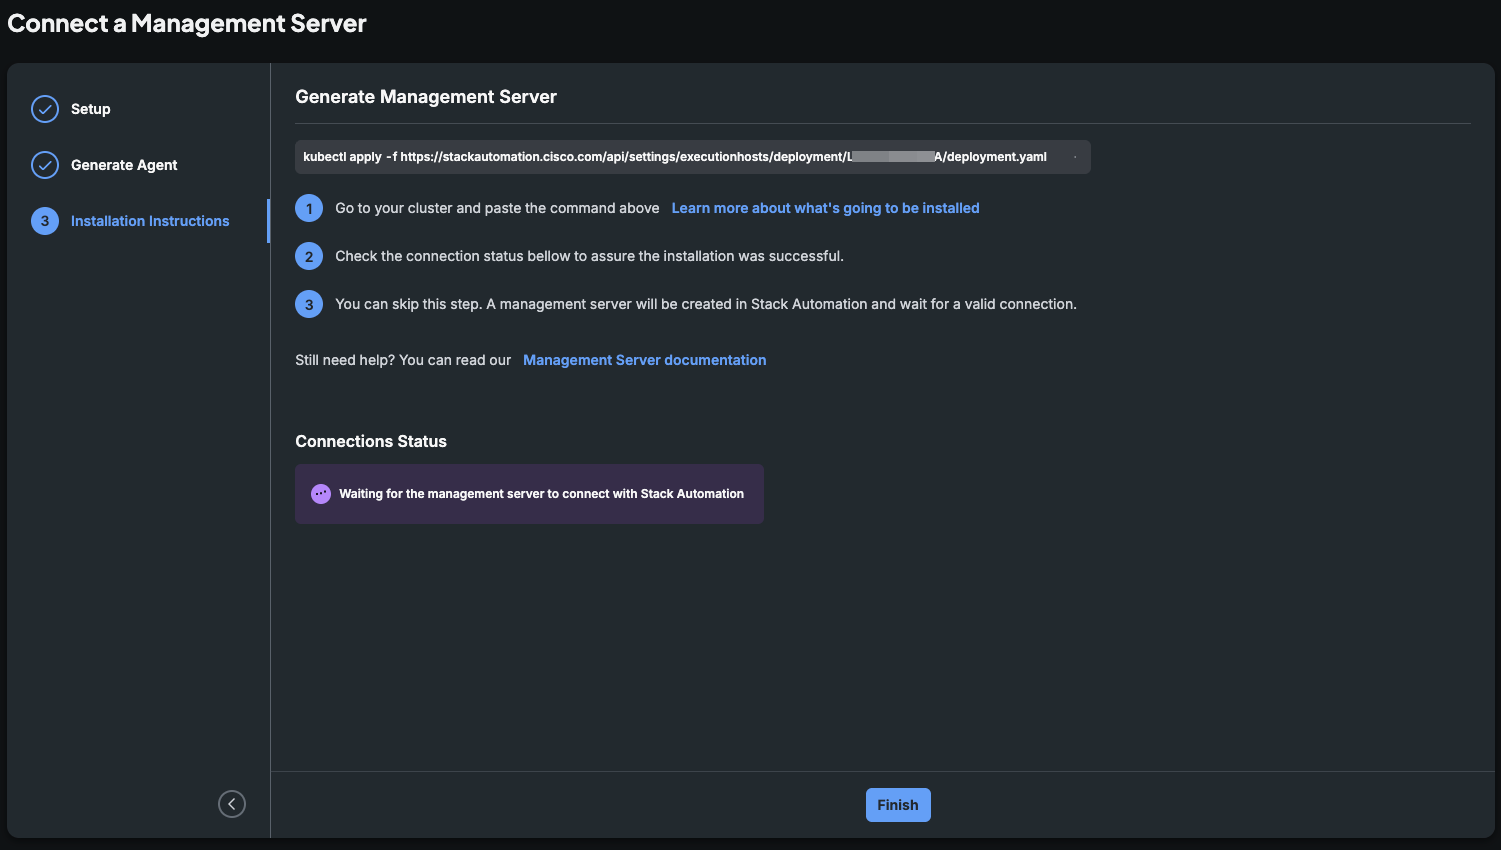
d. On the Installation Instructions step, copy the generated
kubectl applycommand and run it in Azure CLI against your AKS cluster.e. Return to Stack Automation and wait for the connection status to change to a green Connected.
-
You may override the default credentials defined for the AKS management server, or define the credentials if no credentials were configured as the default.
a. In the Terraform grain, specify the service-account name under spec > agent:
spec:
  source:
    ...
  namespace:
  agent:
    name: {aks_management_server_name}
    service account: {new_service_account_name} # this is the k8s service account created above
b. Under
env-vars, add the following (will override the default definition of the AKS management server):ARM_SUBSCRIPTION_ID: <Subscription_ID>
ARM_TENANT_ID: <Tenant_ID>
ARM_CLIENT_ID: <Client_ID>