Policies
Stack Automation role: Account admin
Why use policies?
Using policies for the consumption of deployments offers a multitude of benefits that empower organizations to optimize their cloud usage. Firstly, policies allow for effective cost control by setting limits on resource consumption, ensuring that cloud spending remain within budgetary constraints. Moreover, these policies enable the efficient management of resources by capping the number of concurrent resources per user, preventing resource sprawl, and ensuring fair allocation. Additionally, policies can restrict a deployment's uptime duration, enhancing security and minimizing the risk of unused resources running indefinitely. In sum, the implementation of policies for deployment consumption not only fosters financial prudence but also enhances resource governance and security, making it an invaluable asset in the realm of cloud management.
Stack Automation policies are triggered as part of the deployment pipeline for specific lifecycle events (launch or extend deployment duration for example) or during the provisioning of deployments (e.g. when evaluating a Terraform module included in the deployment). Stack Automation policies are powered by OPA (Open Policy Agent).
Example Use Cases
You can use Stack Automation policies for cost and consumption control. Examples include:
- Limiting the maximal duration of deployments
- Limiting the concurrent number of deployments per user
- Limiting the total cost of deployments
- And more.
In this article:
- Why use policies?
- Example Use Cases
- How policies work
- Policy labels
- Stack Automation built-in policies
- Custom policies
- Approval policies
- How to set up a policy
- Duplicate a policy
- Updating policies
How policies work
Policies are based on two basic elements: trigger and context. Trigger determines when the policy is activated, and context is the data the policy needs to get ("input" in OPA terms). The context is provided automatically by Stack Automation. Users can also define user data ("data" in OPA terms) in the Stack Automation policy. The context (or input) is the actual deployment data the end user is trying to deploy, and the user data sets values to the limitations imposed by the admin who set up the policy.
Stack Automation supports 3 types of triggers, which are defined by the package being used in the policy's .rego file:
- Consumption policies (triggered on catalog launch). To define a consumption policy, the ".rego" file must use the package name torque.consumption
- Deployment lifecycle policies (triggered on launch after completing the launch dialog, or extend). To define a deployment lifecycle policy, the ".rego" file must use the package name torque.environment
- Terraform evaluation policies (triggered on terraform plan for terraform grains). To define a terraform plan evaluation policy, the ".rego" file must use the package name torque.terraform_plan
Policies are applied on the space or account level, as explained in How to set up a policy.
Policy labels
There are 5 labels that will be automatically applied to policies in Stack Automation, in the Policies administration page:
- Built-in label is assigned to policies that come out of the box with Stack Automation. For details about the policies, see https://github.com/QualiTorque/opa
- Terraform label is assigned to policies that evaluate the Terraform plan on the deployment's Terraform grain. These policies are triggered when Stack Automation deploys the Terraform grain's plan during the deployment's initialization
- Environment label is assigned to policies that are triggered when the deployment is launched (upon completing the launch wizard) or extended
- Consumption label is assigned to policies that are triggered when the catalog item is clicked
- Approval label is assigned to policies that could require approval to launch the deployment
- Annotations label is assigned to files that are used to evaluate dynamic deployment annotations. See Environment Annotations.
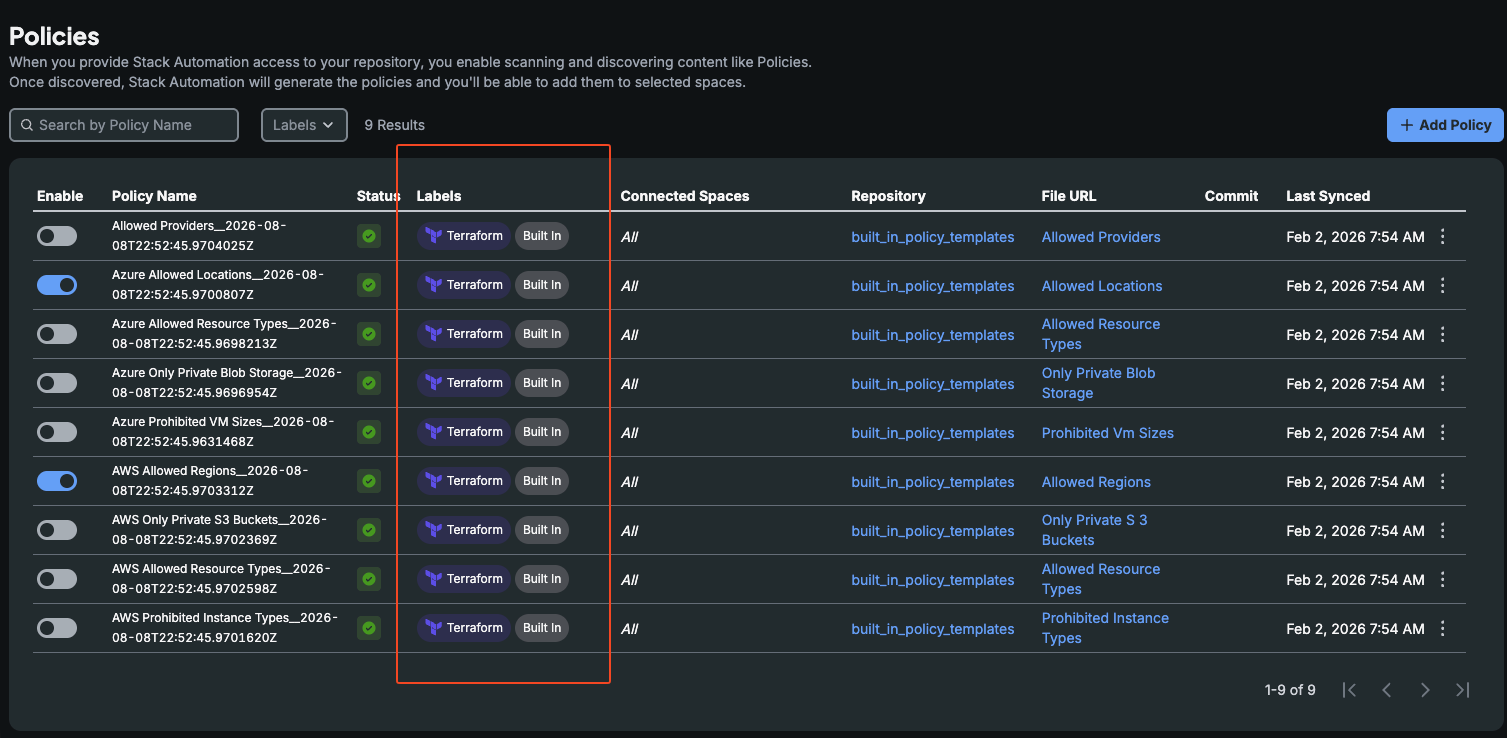
Stack Automation built-in policies
Stack Automation provides many built-in policies, both for deployment lifecycle and Terraform plan evaluation, which represent some of the more common use cases for deployments. Some examples include:
- Allow only specific AWS instance types to be used
- Allow deploying only to specific Azure locations
- Allow only deployments with an expected cost of < 10$
Custom policies
There may come a time when you will need to go beyond the common use case and write your own policies and rules. This is possible using custom policies. Custom policies are .rego files that reside in your git repository. When you add the policy repository to Stack Automation, Stack Automation automatically discovers the repository and identifies its .rego files as policies, allowing you to choose which policies to import into Stack Automation. Same as with built-in policies, you select where to apply the policy (on the entire account or specific teams) and configure the relevant data.
Developing your own policies
Developing Stack Automation policies
-
Package: For Stack Automation to recognize and be able to execute your policy, you need to use the torque packages. The packages that are currently available are torque.consumption, torque.environment and torque.terraform_plan. So your first line of the rego file which is the package name should be one of these packages.
-
terraform_plan policies need at least one deny rule to be valid. For example, a terraform_plan policy can look like this:
package torque.terraform_plan

deny[reason] {
    all := resources["aws_iam"]
    count(all) > 0
    reason:= "Deployment contains IAM changes"
} -
environment and consumption policies need to return at least one result object with a decision element in it. The decision value can be one of "Denied", "Manual" or "Approved". In addition to the decision element, you can optionally add a reason element that explains the reason for the decision. For example, an environment policy can look like this:
package torque.environment

result = { "decision": "Denied", "reason": "Deployment duration exceeds 5 hours" } if {
    input.duration_minutes > 300
}
Inputs
Based on the policy type (environment , consumption or terraform_plan) Stack Automation will provide input to OPA once the policy is injected. For terraform_plan policies, the input is the terraform plan output. For environment policies, the input is the following json object:
{
    "blueprint": {
        "name": "my-bp-name",
        "repository": "my-repo",
        "labels": [],
        "url": "https://github.com/...",
        "last_modified": "0001-01-01T00:00:00",
        "grains": [
            {
                "kind": "terraform",
                "name": "helloTF"
            }
        ]
    },
    "inputs": [
        {
            "name": "input_name",
            "type": "string",
            "value_v2": {
                "value": "input_value"
            }
            "sensitive": false, // true|false
            "description": null
        }
    ],
    "workflows": [
        {
            "name": "<workflow_name>",
            "schedules": [
                "* * * * *",
                "0 * * * *" //null in schedules means the schedule was disabled
            ],
            "inputs": {
                "<input_name_1>": "<input_value_1>",
                "<input_name_2>": "<input_value_2>"
            }
        }
    ],
    "timezone": "Asia/Jerusalem",
    "duration_minutes": 100, // in launch, the requested duration. In extend, the total duration before the extension
    "extend_duration_minutes": 100, // null if the action is "launch"
    "blueprint_avg_hourly_cost": null,
    "space_name": "my_space",
    "user_email": "me.l@mycorp.com",
    "groups": ["group1", "group2"],
    "roles": {
        "account_roles": ["role1", "role2"],
        "space_roles": ["role3", "role4"],
    },
    "is_git_environment": false,
    "entity_name": "my-env", //deployment name
    "action_identifier": {
        "entity_type": "Environment",
        "entity_id": null,
        "action_type": "Launch" // options: "Launch", "Extend"
    },
    "owner_active_environments_in_space": 1, // # of the current owner's active deployments in space
    "owner_active_environments_in_account": 1,  //  # of the current owner's active deployments in the account
    "owner_active_environments_from_blueprint_in_space": 2, // total # of deployments launched by the owner and using the blueprint
    "initiator_active_environments_from_blueprint_in_space": 1, // total # of deployments launched by the owner or launcher and using the blueprint
    "active_environments_in_space": 1, // total # of active deployments in the space
    "active_environments_in_account": 2 // total # of active deployments in the account
}
Usage example:
result = { "decision": "Denied", "reason": "Requested deployment duration exceeds 180 minutes" } if {
   input.duration_minutes > 180
}
For consumption policies, the input is similar to the object in environment policies, except the consumption policies are triggered before the user completes the launch dialog, which means the blueprint input values and workflow details are not available yet. Therefore, the relevant sections are omitted from the input json object:
{
    "blueprint": {
        "name": "my-bp-name",
        "repository": "my-repo",
        "labels": [],
        "url": "https://github.com/...",
        "last_modified": "0001-01-01T00:00:00",
        "grains": [
            {
                "kind": "terraform",
                "name": "helloTF"
            }
        ]
    },

    "timezone": "Asia/Jerusalem",
    "duration_minutes": 100, // in launch, the requested duration. In extend, the total duration before the extension
    "extend_duration_minutes": 100, // null if the action is "launch"
    "blueprint_avg_hourly_cost": null,
    "space_name": "my_space",
    "user_email": "me.l@mycorp.com",
    "groups": ["group1", "group2"],
    "roles": {
        "account_roles": ["role1", "role2"],
        "space_roles": ["role3", "role4"],
    },
    "is_git_environment": false,
    "entity_name": "my-env", //deployment name
    "action_identifier": {
        "entity_type": "Environment",
        "entity_id": null,
        "action_type": "Launch" // options: "Launch", "Extend"
    },
    "owner_active_environments_in_space": 1, // # of the current owner's active deployments in space
    "owner_active_environments_in_account": 1,  //  # of the current owner's active deployments in the account
    "owner_active_environments_from_blueprint_in_space": 2, // total # of deployments launched by the owner and using the blueprint
    "initiator_active_environments_from_blueprint_in_space": 1, // total # of deployments launched by the owner or launcher and using the blueprint
    "active_environments_in_space": 1, // total # of active deployments in the space
    "active_environments_in_account": 2 // total # of active deployments in the account
}
data
The data object is the user-defined inputs that will also be passed to OPA for evaluation. The data object structure is defined by the policy writer, and the values are provided through the Stack Automation UI.
For example, the policy can look like this:
result = { "decision": "Denied", "reason": "Deployment duration exceeds the configured max duration" } if {
   input.duration_minutes > data.max_duration_minutes
}
In this case, the policy expects a data object with one key: max_duration_minutes.
In Stack Automation, it would look like this:
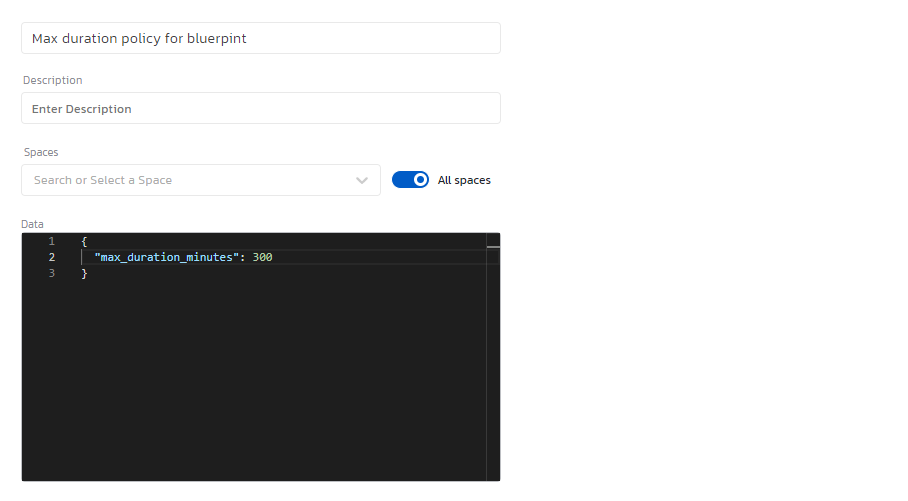
So you can enter whichever value you want as the maximum duration to be enforced on deployments.
Rego restricted functions
Stack Automation supports all rego built-in functions, except the following list:
- "http.send";
- "opa.runtime";
- "rego.parse_module";
- "time.now_ns";
- "trace";
For more details on how to develop policies, see OPA documentation and OPA playground.
- For example, custom policies, see Quali Stack Automation built-in OPA policy templates.
- Note that Stack Automation points to a specific commit. Therefore, to introduce a new version of a custom policy, develop, test and pass the policy through your regular git flow. Once you are done, update the commit version in Stack Automation by clicking "Update Rego".
Approval policies
Stack Automation allows you to configure your policy with conditions that will trigger manual approval of a deployment request by a set of designated approvers via multiple optional channels: email, Microsoft Teams or Slack channels, ServiceNow and more.
For example, you could have an approval policy that sets the max_duration for deployments at 3 hours, so attempting to launch a deployment with a duration that is longer than 3 hours will require approval.
Approvers are defined in the Approval Channels administration page.
How to set up a policy
-
Go to Governance > Policy Repositories and click Add a Repository.
-
Select the git repository, specify the repository's URL, and give it a name.
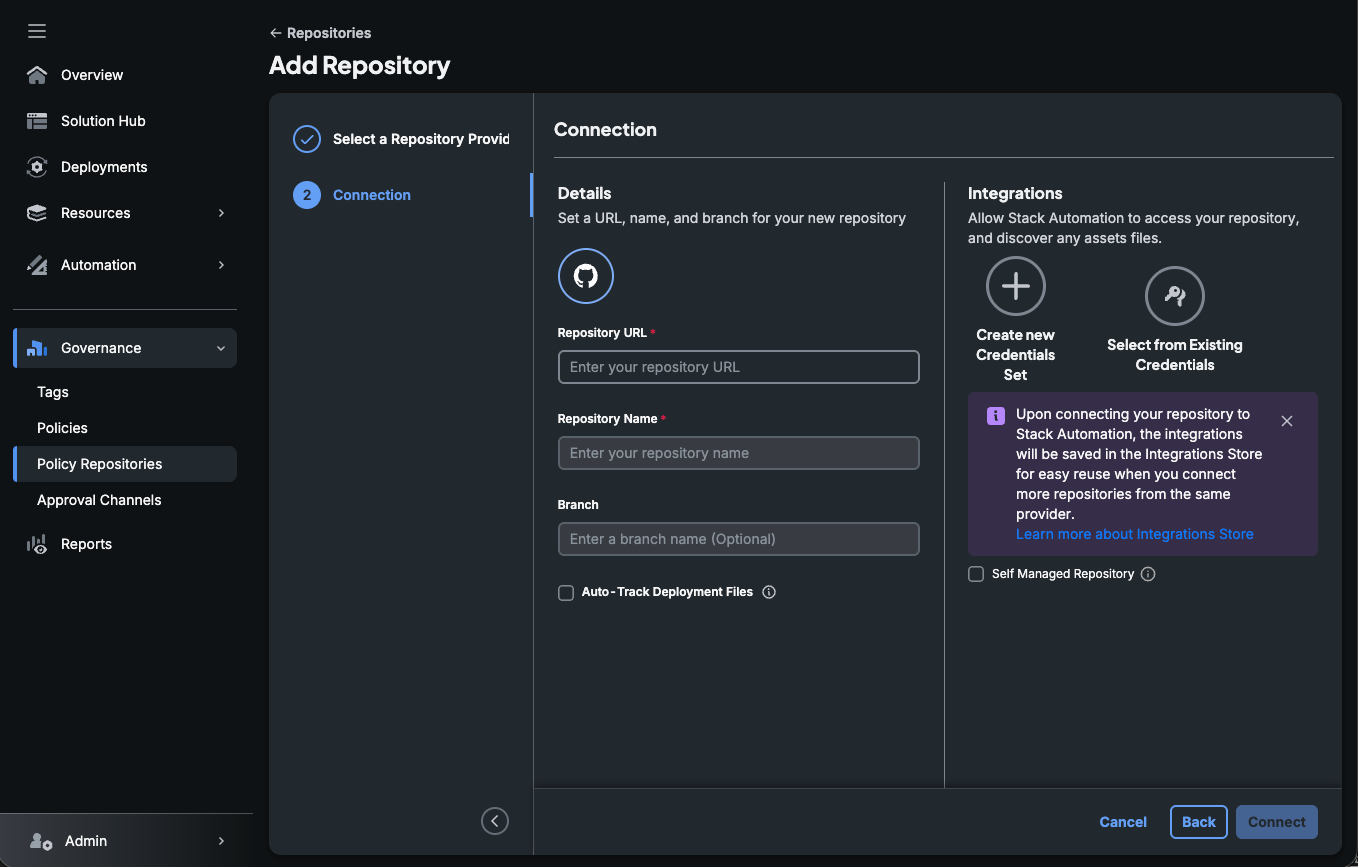
-
Click Connect. Provide authorization credentials if the repository is private.
-
From the repository menu, click on the Discover Policies to import existing policies.
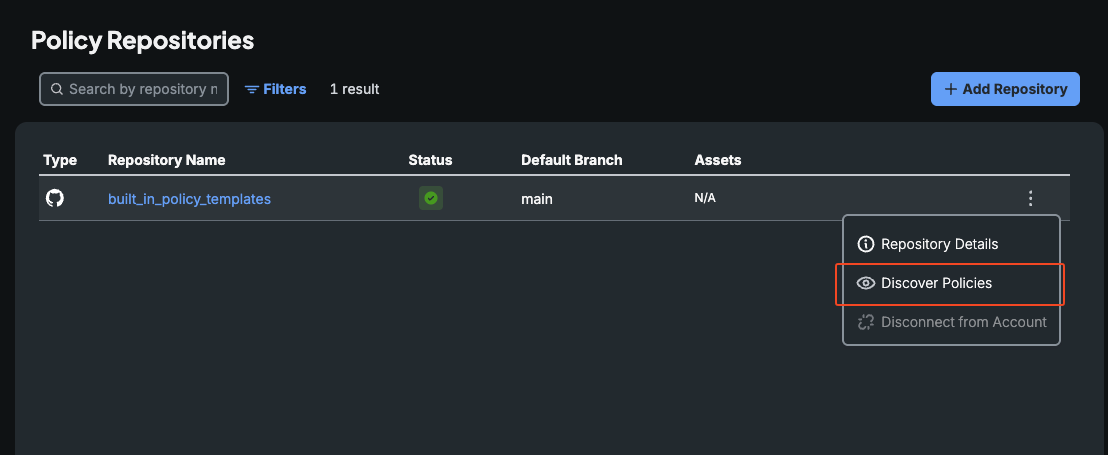
-
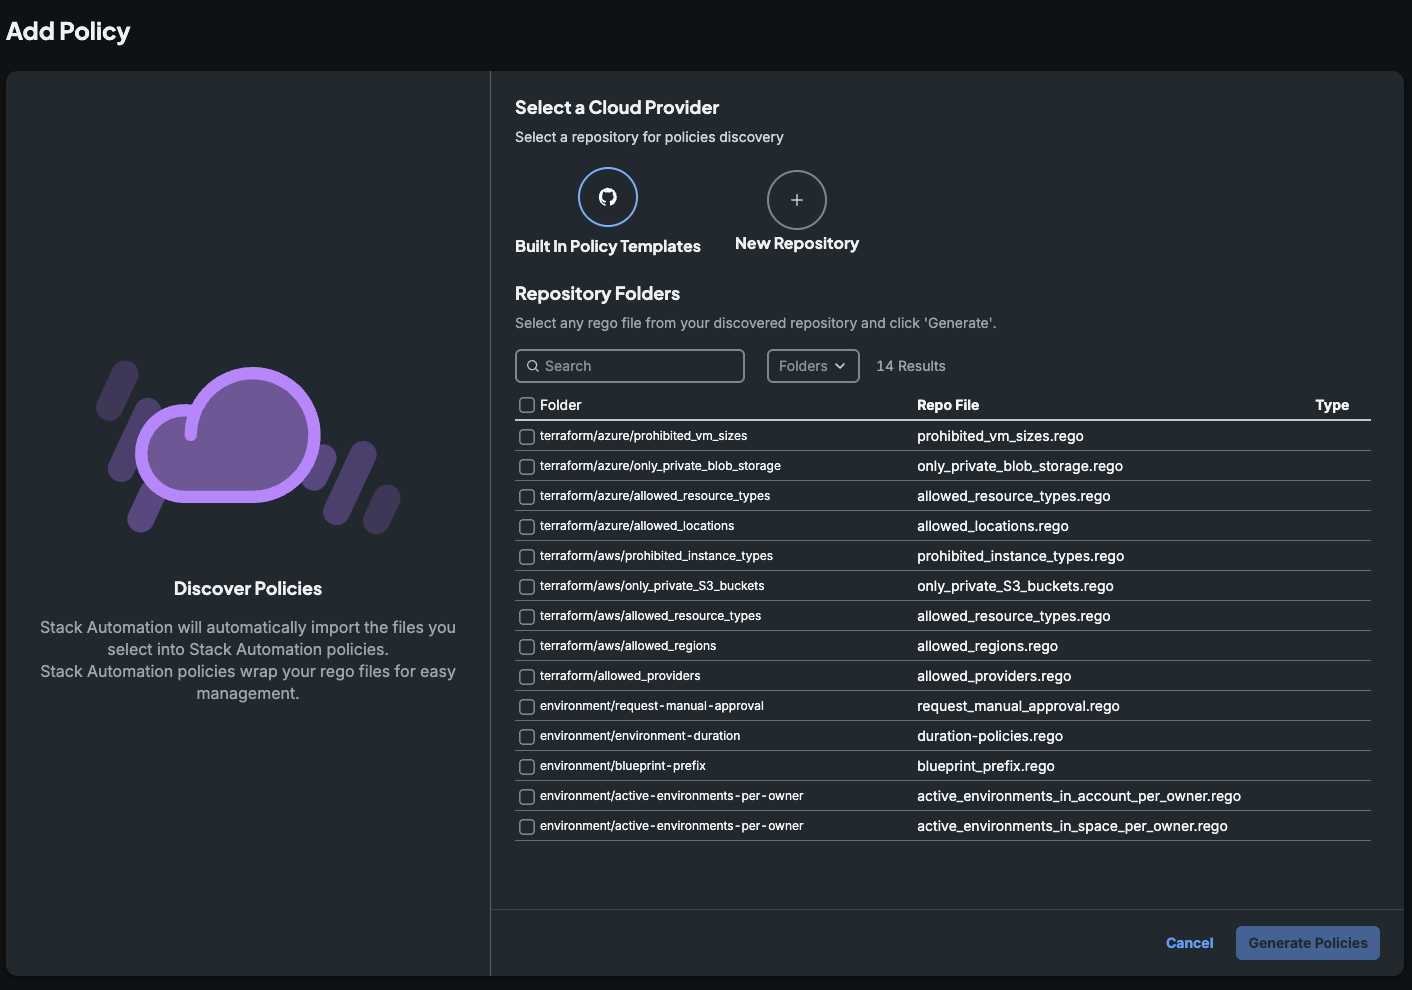
Select the policies you want to import into Stack Automation and click Generate Policies.
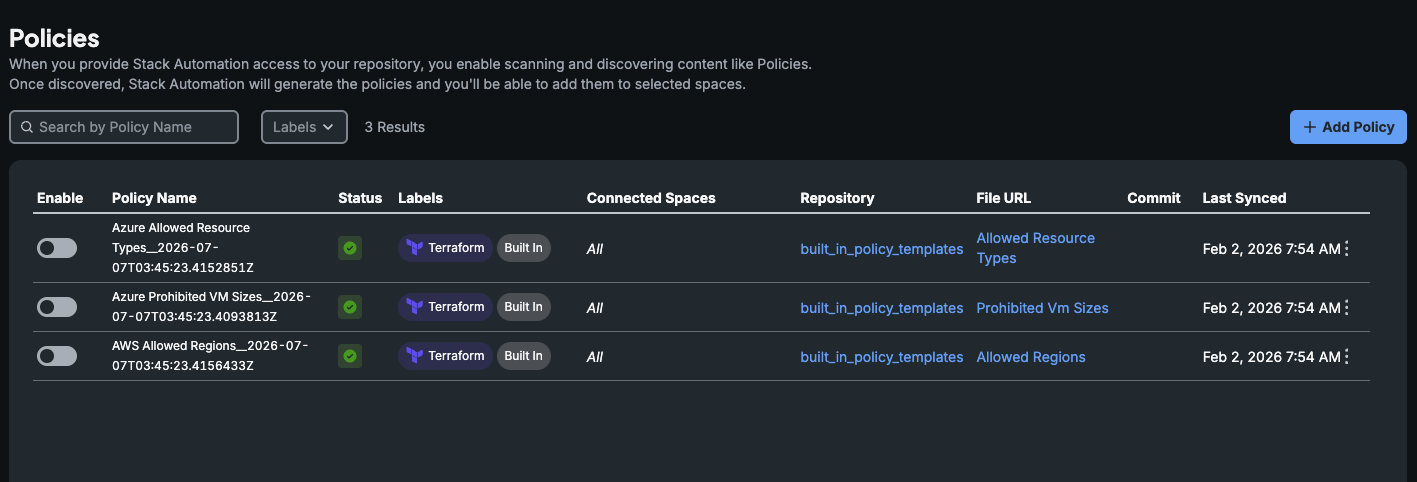
The policies are displayed in the Policies page.
-
Click a generated policy and edit the details.
a. Optionally change the Name, and provide a Description.
b. In Spaces, set the scope of the policy - All spaces or specific ones.
c. In Data, set the policy's limitations.
-
Click Save.
-
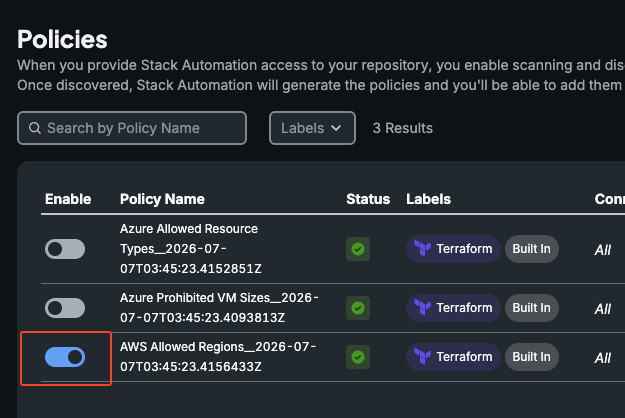
Enable the policy.
Duplicate a policy
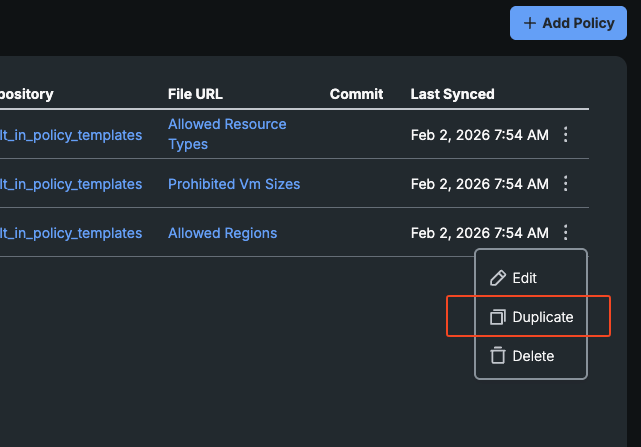
You can also duplicate any built-in or custom policy to create a similar version with different user data. For example, You could have a policy that allows the use of cloud region "us-east-1" for the US team, and another one for the EU team that allows region "eu-west-1".
Updating policies
Stack Automation's custom policies are version controlled in git. Next to each policy, you can see the specific commit which is currently being used for that policy across the account:
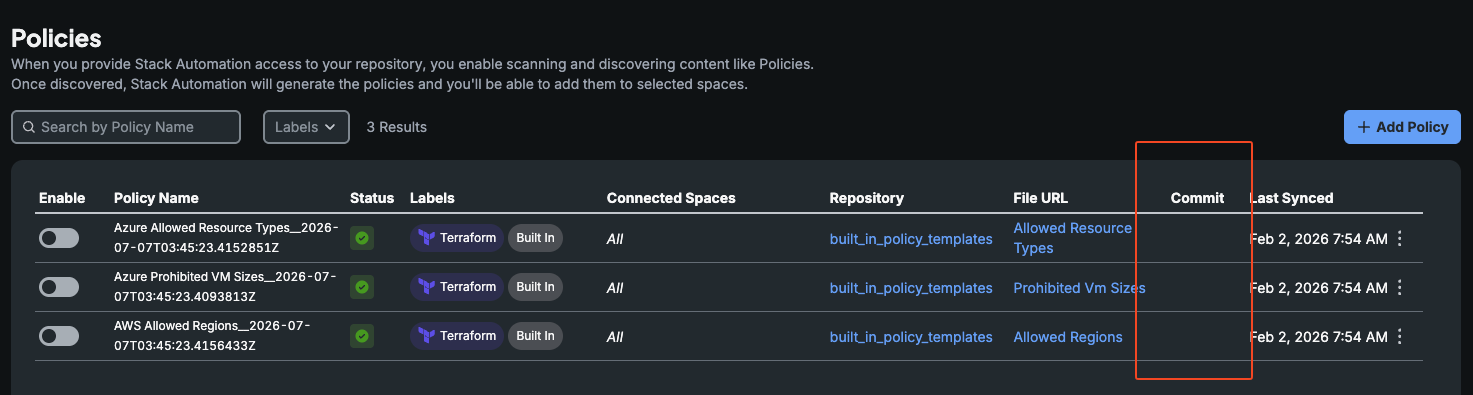
From time to time, there will be a need to modify the policy's code (rego file). However, we must update the policy without any disruption to the users. This means that the data object format and the rego file must match.
Clicking on the policy there is an option to update the rego:
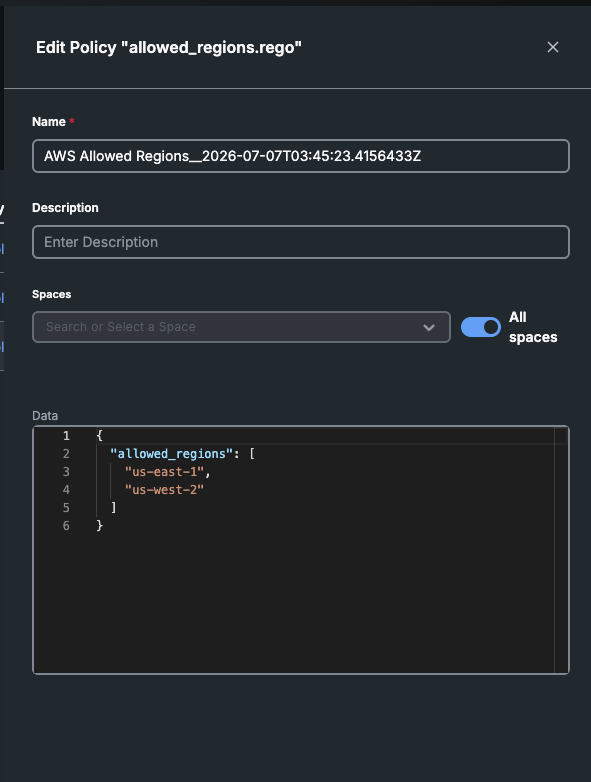
If there is no change in the data object format, the update is completed and applied across the account. However, if there is a change in the data object, we cannot complete the update until the user will complete the change of the data object, otherwise the policy will start failing and will cause a disruption for the account users. Therefore, when Stack Automation detects a change in the format of the data object, it will load the new data object structure and wait for the user to modify it. Once done, the user needs to invoke the "update-rego" again and at this point it will complete successfully as the rego code and the data format match.