Stack Automation Control plane helps you to accelerate migration of existing cloud resources into fully managed Stack Automation deployments with a few simple steps regardless of how the resources were deploy in the cloud in the first place.
In the below article, we will cover the following steps for importing cloud resources into Stack Automation using Terraform generation:
- Generate Terraform code (modules) representing your existing deployed resources in the cloud.
- Generate Terraform state file that represent the deployment status.
- Generate Stack Automation blueprint that uses the Terraform code as an automation grain.
- Import your cloud resources into a fully managed Stack Automation Deployment.
NOTE: This guide will focus on AWS workloads as an example, but it's possible to use it for other cloud providers (cloud and on-prem), network providers, monitoring systems and more.
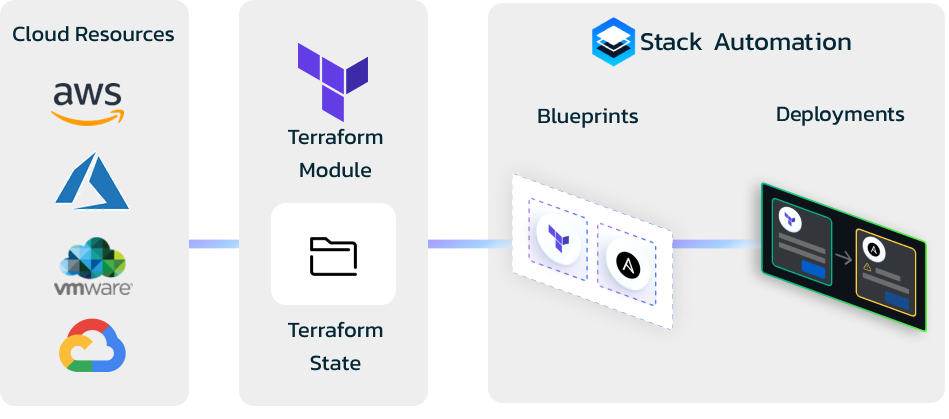
Importing a Deployment into Stack Automation
This guide walks you through the process of importing an existing deployment into Stack Automation, starting from resource curation to final import using the API. Follow these steps to successfully onboard a deployment into Stack Automation.
Step 1: Curate and codify a Resource
- Start by curating the resource you want to manage in Stack Automation. After curating, you'll obtain the Terraform files and the corresponding
tfstatefile.
Step 2: Edit the Providers File
- Open the
providersfile within the Terraform files and remove the following sensitive credentials:- Access Key
- Secret Key
- Token
Step 3: Upload Terraform Files to Git
- Upload all the Terraform files, excluding the
tfstatefile, to your Git repository. For this example, place them under the folderterraform/curate-example.

Step 4: Create a Matching Blueprint
-
Create a corresponding Stack Automation blueprint for the deployment, named
curate-example.yaml. Here's an example blueprint:spec_version: 2
inputs:
agent:
type: 'agent'
grains:
s3:
kind: 'terraform'
spec:
source:
store: 'bps'
path: 'terraform/curate-example'
agent:
name: '{{ .inputs.agent }}'
inputs: [] -
Note: There is no need to specify the Terraform backend in the blueprint.
Step 5: Create an S3 Bucket and upload the tfstate File
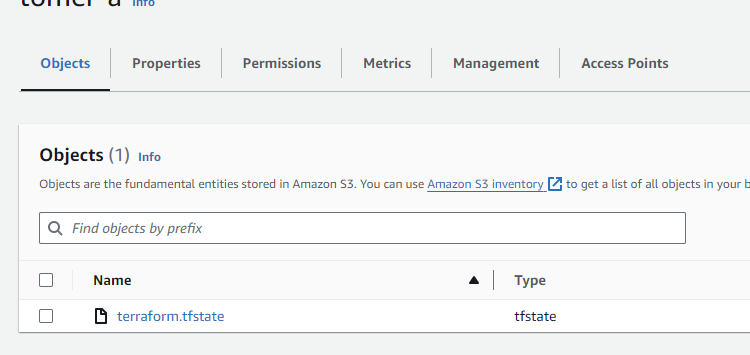
- Create a new S3 bucket to store the
tfstatefile, which will act as the Terraform backend for state management. - Upload the
tfstatefile you received during the curation process to the S3 bucket created.
Step 6: Use the Import API
-
To import the deployment using the Stack Automation API, make the following POST request using
curl. -
The API response will include the
environment-id. After importing, you will see an import step, followed by an apply step with Stack Automation tags applied to the deployment.curl -X POST "https://stackautomation.cisco.com/api/spaces/{space_name}/environments/import_using_blueprint" \
-H "Content-Type: application/json" \
-d '{
"source": {
"blueprint_name": "curate-example",
"repository_name": "bps"
},
"environment_name": "my-env",
"owner_email": "email@quali.com",
"grains": [
{
"kind": "terraform",
"name": "s3",
"agent": {
"name": "agent-name"
},
"backend": {
"type": "s3",
"bucket": "my-state-bucket",
"region": "eu-west-1",
"key": "terraform/terraform.tfstate"
}
}
],
"inputs": {
"agent": "agent-name"
}
}'
Important Considerations
-
Destroying Resources: If you are importing a resource that already exists in the cloud, keep in mind that ending the deployment in Stack Automation will destroy the resource.
-
To avoid unintended deletion, you can release the deployment by running the following API command using
curl:curl -X DELETE "https://stackautomation.cisco.com/api/spaces/{space_name}/environments/{environment_id}/release?force={false/true}" -
Use the
releaseAPI to ensure resources are not deleted during the termination process.
Importing Terraform State from Another AWS Account
To import Terraform states from another account that cannot be accessed directly by the IAM role associated with the management server, follow these steps:
1. Set Up IAM Role in Target Account
- Ensure the IAM role in the target account has a trust relationship that allows the role used in the automation account to assume the target account role.
2. Configure Import Payload
- Add the following to the import payload:
  curl -X POST "https://stackautomation.cisco.com/api/spaces/{space_name}/environments/import_using_blueprint" \
  -H "Content-Type: application/json" \
  -d '{
    "grains": [
      {
        "kind": "terraform",
        "name": "s3",
        "agent": {
          "name": "agent-name"
        },
        "backend": {
          "type": "s3",
          "bucket": "my-state-bucket",
          "region": "eu-west-1",
          "key": "terraform/terraform.tfstate",
          "role-arn": "<arn-of-target-account-role>" # set up the target role-arn that has access to the bucket and key configured above
        }
      }
    ]
  }'
Important Notes
- Terraform version 1.5.7 is recommended. You can set it in the blueprint or in the import request
- You might need to use another role in the blueprint as well, using the provider-overrides feature
- Make sure to provide the Stack Automation authentication token. This can be a short or long-token
- The source section points to the blueprint generated and the repository name onboarded to Stack Automation.
- The backend section added in under the grain should point to the state file exported and uploaded to the backend of choice.
By following these steps, you'll be able to successfully import and manage a deployment in Stack Automation while ensuring security and state management.