Service Now
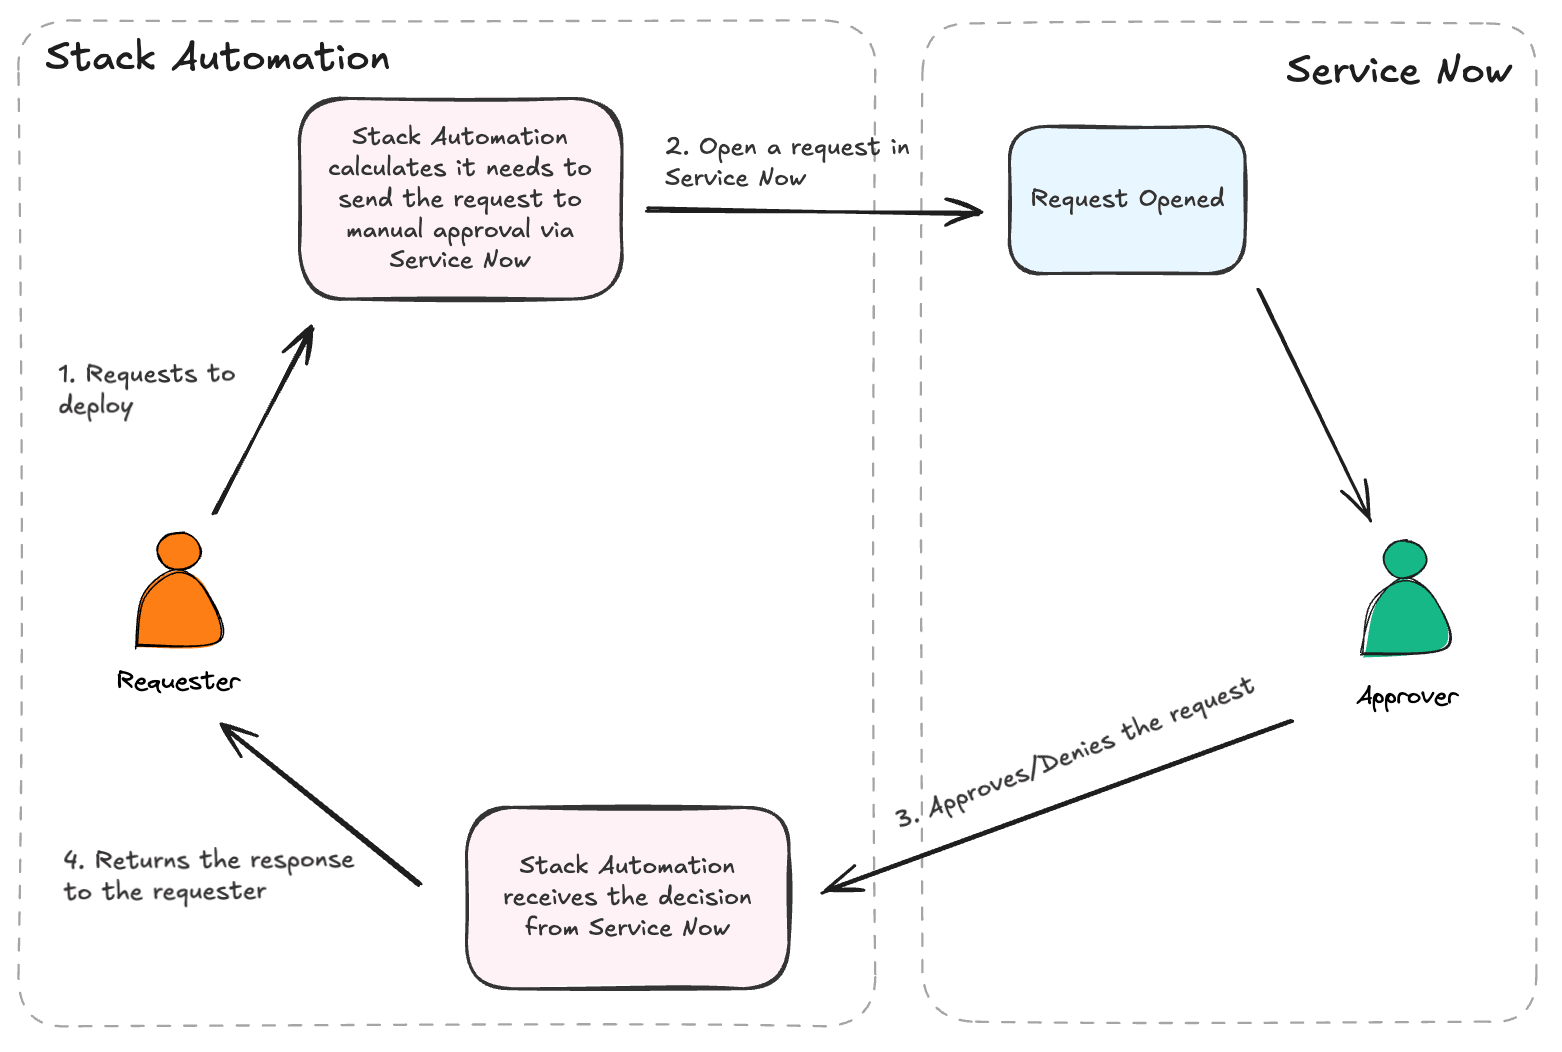
Flow overview
Stack Automation has a built-in integration with Service Now for approval flow. If your organization is using Service Now for ITSM, you can configure the integration and perform your approval flow through your Service Now portal.
Prerequisites
In order to configure the ServiceNow integration, you will need to have the Stack Automation Integration XML file. Please contact Stack Automation Support to get this file.
1. Install the ServiceNow Stack Automation Application
- In Service Now, Go to ->
Retrieved Update Sets - In the bottom, there is a link:
Import Update Set from XMLclick it, and choose the file you received from Stack Automation support. - Select the record and press on
Preview Update Setand thencommit
2. Create a service user for Stack Automation
- In Service Now, Create a dedicated user for Stack Automation integration. This user does not need any special permissions in ServiceNow, just to be able to login to the system.
- Take note of the username and password of this user, you will need this information in the next steps.
3. Approval Channel Configuration
-
In Stack Automation:
- You will need a user in Toruqe that will be the approver for the approval channel. Note, currently only one approver can be assigned to each approval channel. The user can be one of your existing users, or a new one which can serve as a service user. This user does not have to be a real user in Stack Automation, it is just a user for the purpose of this integration. This user needs to be a member of the space(s) where you want these approvals to be created. To create a new user you should invite the new user via email.
- Log in to the Stack Automation UI as the approver user from step 1, and create an API token. See Generating a new Stack Automation API Token . Take note of the generated Token.
-
In ServiceNow:
- Update Stack Automation API token : Go to
sys_properties.listand updateTorque_Tokenwith the value of the generated API token. - Update Stack Automation Base URL Go to
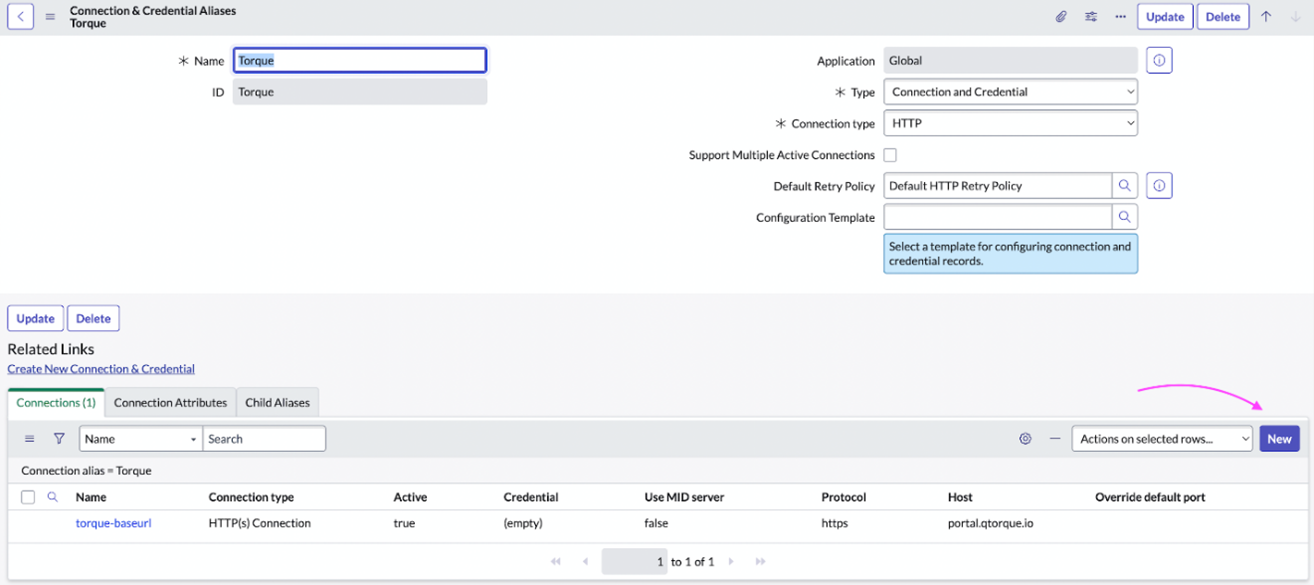
Connection & Credential Aliasesand click onStack Automation - Add a new connection by clicking the
Newbutton:
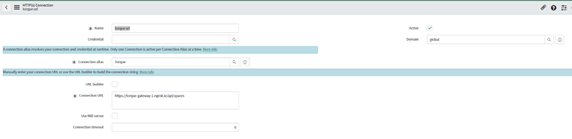
- In case you have a connection just edit the record with the correct URL:
- Update Stack Automation API token : Go to
-
In Stack Automation:
- Navigate to
Administration->Approval Channels - On the top right corner, click on
Add Channel. - Fill a name and description of your choice and click on the ServiceNow icon.
- Fill the following details:
- ServiceNow address URL - your base service now tenant URL. For example: https://mytenant.service-now.com/
- Username - The Stack Automation dedicated ServiceNow user which you created in Step 2
- Password - The Stack Automation dedicated ServiceNow password of the same user
- Approvers - the Stack Automation approver user which you selected/created in step 3.1. It must be the same user to which the Stack Automation token belongs.
- Navigate to
-
In ServiceNow: Review Approval Flow template
- Go to
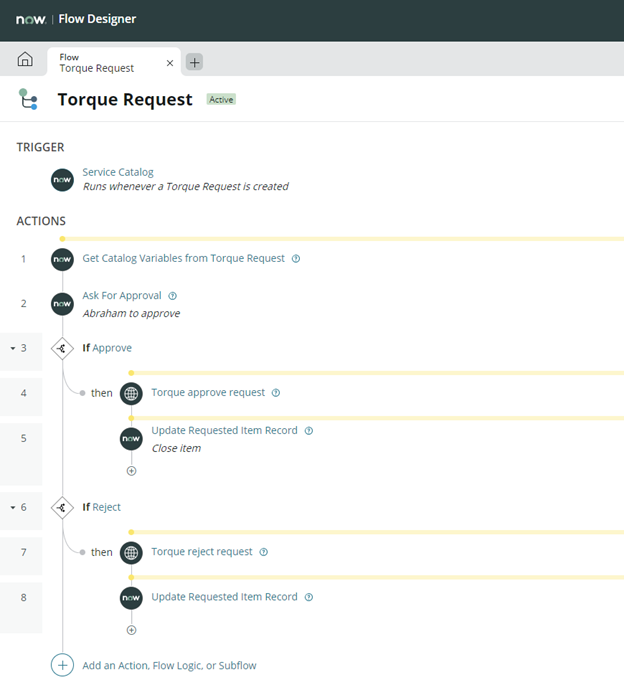
Flow Designer -> Flowsand select type in the searchbox for “Stack Automation Request”. - Select it and configure approvers under
Ask for Approvalaction:
- Go to
The approvers don't have to be Stack Automation users.
-
In ServiceNow: View approval flow
- Go to
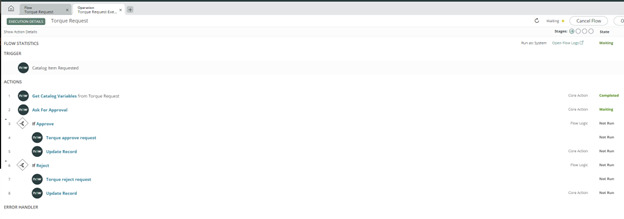
Flow Designer -> Executionsand select the relevant executed flow:
- Go to
tip
You can create multiple approval channels for service now, each can have different approvers for different spaces. Repeat the configuration steps for each channel.